Supplies Needed
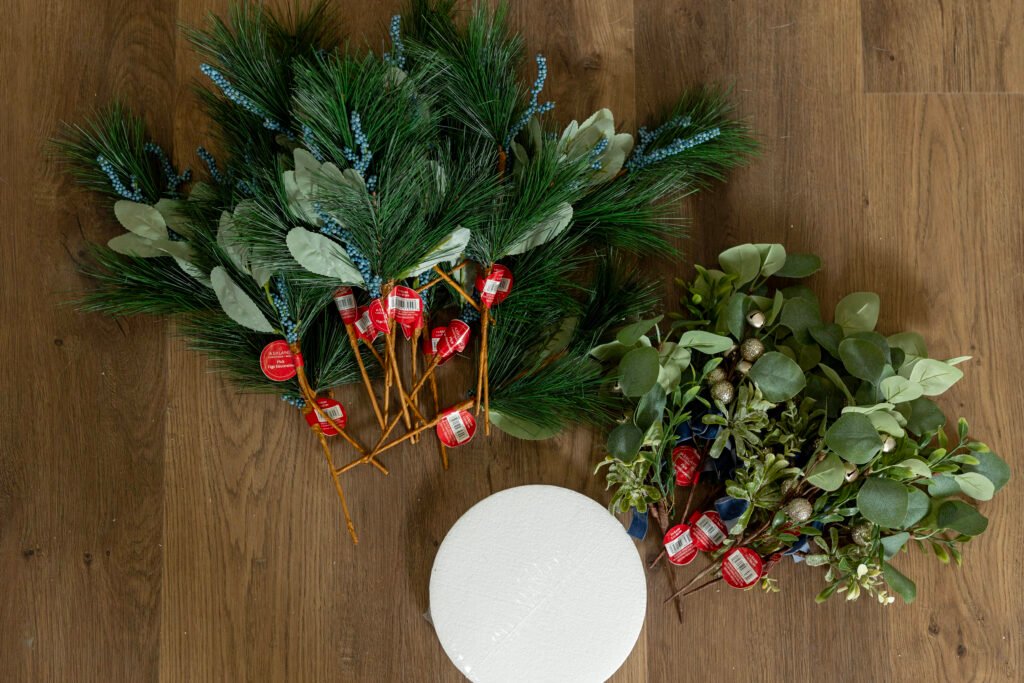
These are the supplies I use. Feel free to alter them to what you have on hand or have access to.
Hot Glue Gun
I use a mid-range hot glue gun that I bought from Michael’s. You will want to shy away from the really inexpensive ones as they do not heat enough glue in one shot to complete any part of the wreath. The really cheap ones are wildly uncomfortable to use, so spend an extra $5-$10 on a better one.
Styrofoam Disk
I used an 8″ disk for this wreath, but a 6″ or 10″ one would work just as well. Nothing fancy here, it will get covered up by the wreath material anyway.
If your wreath will have large gaps, consider painting the foam before you begin to help it blend in.
Loose Stems
I like to shop after Christmas when all the loose stems are 80% off. For my wreaths, I need at least 2 different types of stems and 8 of each of them. When I get them on clearance, I can usually buy everything for under $30.
Ribbon
Unless you’re planning to mount the wreath to the wall (which I’ve done in my dining room) you’ll want add some coordinating ribbon to hang your wreath. This can also usually be found at a steep discount after Christmas.

Step 1
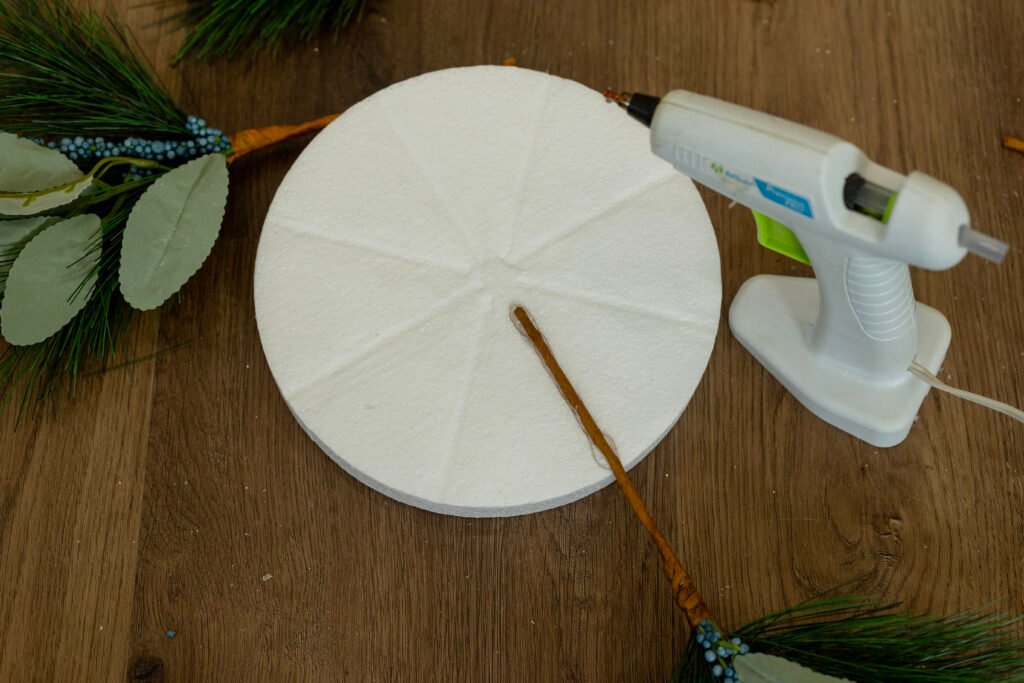
Plan the Wreath
After you’ve gathered all of your supplies, it’s time to get creative. For this project, I’ve used 2 types of loose stems that I got on clearance after Christmas. You can easily get these before Christmas, but they’ll be much, much more expensive. I find it best to plan ahead and buy them at 80% off. Then, I leave them in the closet until the next year and I get excited about them all over again.
You need to plan your wreath before gluing anything down. It’s terrible to have to take things apart because it didn’t turn out the way you thought it would. Planning will alleviate the possibility of having to undo all your hard work. Press the wire stems into the foam to divide it into 8 equal sections. These will be your guides for where to glue down the stems. You can etch out the foam here or just leave it as guidelines. I find it easier and less time consuming to just use them as guides, but it’s totally up to you.
Step 2
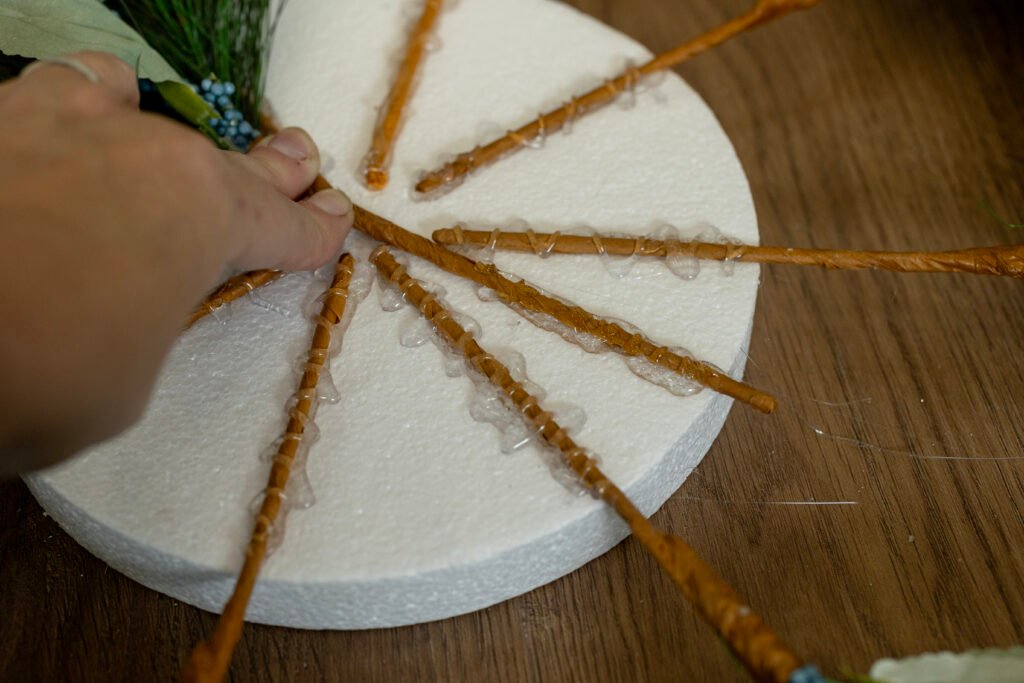
Glue The First Row of Stems
Now that you have your guides for where to glue your stems, it’s time to glue. I’ve already laid out my design and tested it to make sure I like it before gluing it all down. I recommend you put it all together without glue first. You might decide to make some adjustments as you go. Once you glue everything down, you won’t be able to do this.
Glue 8 of the back row of stems to the foam. You will need to wait a bit between stems to give the hot glue a chance to cool and harden. Be patient here. It will take some time, but it will be worth waiting for. Make sure the glue is cooled before moving on to the next stem.

Step 3
Glue The Second Row of Stems
Next, you’ll glue the second row of stems in the gaps left by the first row. You will want these to lay as flat as possible, so as you go around, you will need to start layering and weaving the stems through each other to make them all fit. The stem will go in the gap on the opposite side of the foam from where the foliage will lay.


Step 4
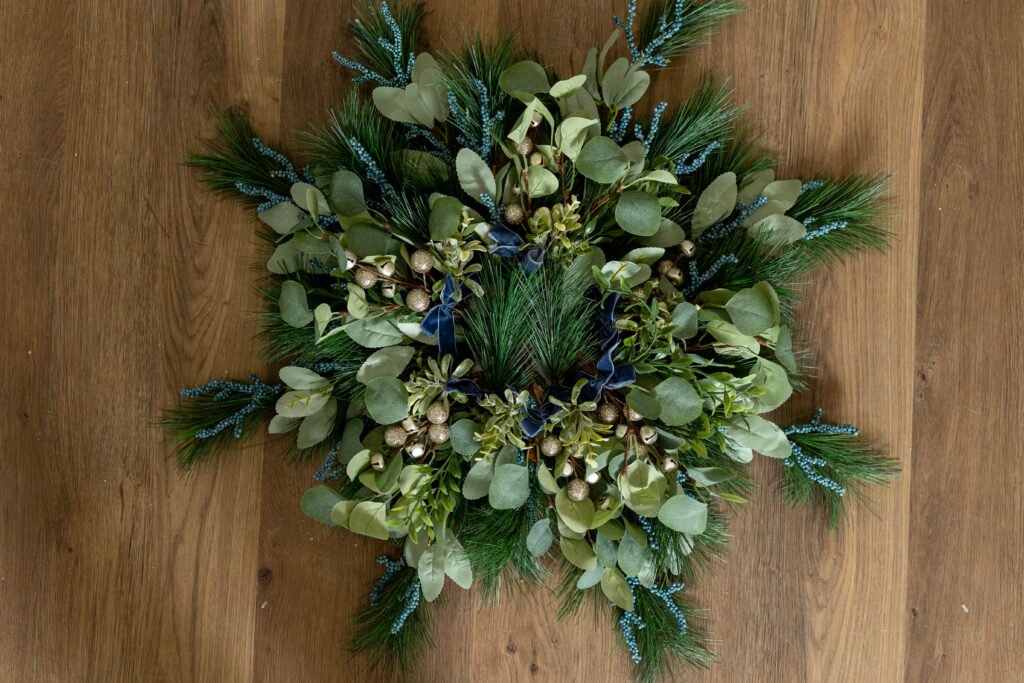
Fill In Gaps in The Wreath
Depending on what stems you chose, you might have some gaps you’ll need to fill in. You can do this with extra stems you have, ribbon or other items like pinecones or bells. Anything you would like can go in the gaps. Just be sure to test fit the items before gluing them in to make sure you like how it looks and that you have enough to do the job.
For my Christmas wreath, I only had a gap in the middle section. I tested out a couple of pinecones and decided to use just one, rather than both. I also tried adding some foliage behind the pinecones. Once I got it all glued, I saw that I didn’t need to add that, so I left it out. These are my set designs.

Step 5
Add Ribbon
Finally, add a ribbon to hang your wreath. To add ribbon, glue it to the back of the foam or around the flat edge of the foam disk to sort of cradle it with the ribbon. Either way, be sure to use a lot of glue. You don’t want your ribbon to detach over time.
My Christmas wreath is going on a wall some Command Strips, so I didn’t add a ribbon to mine.
Now stand back and admire your beautiful new Christmas wreath that looks like you paid $150 for!